
Fun with Avatars: Crafting the core engine | Part. 1


Introduction
In this article series, I will walk you through the development of a service that generates random avatars using cutting-edge AI technology. The service will take specific features and parameters as input and, based on these attributes, deliver a unique avatar to the user. Notably, this project is open source, and available on GitHub. Feel free to fork it, contribute, and enhance its capabilities.
We'll leverage Python's simplicity for accessibility, with potential future translations for broader reach.
Pre-requisites
We will be running this project in Python 3.9 on Mac/Linux, and we will use Poetry to manage our dependencies. Later, we will bundle our app into a container using docker for deployment.
Before diving into the project, ensure you have the following set up:
Python 3.9 installed on Mac/Linux/Windows. Follow these instructions to set it up on your OS.
Poetry installed for managing dependencies. Refer to this article for installation instructions.
Project Design
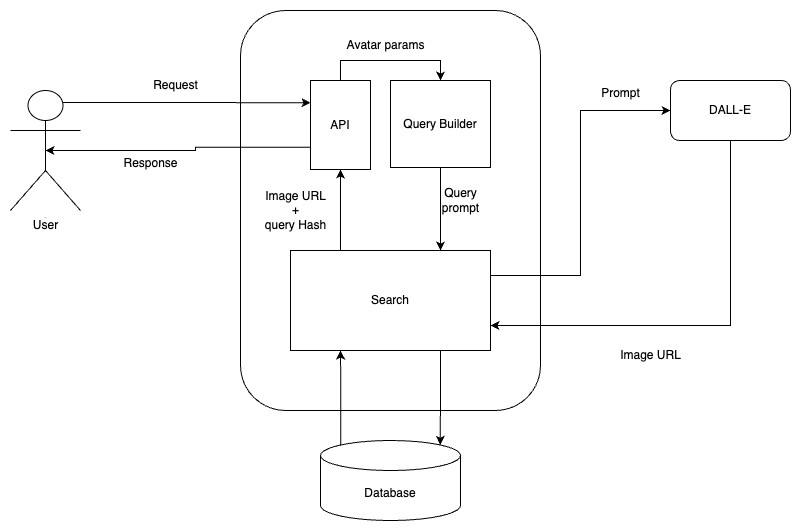
This is a simple overview of what the full project entails:
This project will be broken down into 4 parts:
Part 1: Creating the project, establishing the API, and developing the avatar generation module.
Part 2: Focuses on containerizing the application for deployment.
Part 3: Delves into optimizing the service for cost-effectiveness.
Part 4: Explores the integration of the service into real-life projects.
Create project
Open your terminal and run the following command to create our working folder and navigate to it.
poetry new avatars-as-a-service && cd avatars-as-a-service
That will create a directory avatars-as-a-service with the necessary files.
.
├── LICENSE
├── README.md
└── avatars-as-a-service
    ├── README.rst
    ├── avatars_as_a_service
    │   └── __init__.py
    ├── pyproject.toml
    └── tests
        ├── __init__.py
        └── test_avatars_as_a_service.py
Optionally, initialize a git repository for version tracking. This will create a .git folder in our project if there is none already.
git init
Start a shell session in our virtual environment by running:
poetry shell
Understanding FastAPI
We will be creating our API using FastAPI, a modern high-performance web framework for building fast APIs with Python. It is designed to be easy to use, efficient, and highly scalable. Some key features of FastAPI include:
Speed: FastAPI is built on top of Starlette, an asynchronous web framework, which allows it to handle high loads with incredible speed and efficiency. It is really fast.
Type Annotations: FastAPI utilizes Python’s type hinting system to provide automatic request/response validation, resulting in enhanced reliability and fewer bugs.
API Documentation: FastAPI generates interactive documentation with Swagger UI and ReDoc, making exploring and understanding API endpoints effortless.
Security: FastAPI supports various authentication methods, including OAuth2, API key validation, and JWT tokens, enabling secure API development.
Asynchronous Support: FastAPI is designed to take advantage of Python’s async and await syntax, enabling efficient handling of I/O-bound operations.
FastAPI uses Uvicorn, an ASGI (Asynchronous Server Gateway Interface) web server implementation for Python.
Install them and other required dependencies by running:
poetry add fastapi 'uvicorn[standard]'
Next, create a main.py file at the root of our project with the following code.
from fastapi import FastAPI

app = FastAPI()

@app.get("/")
async def root():
    return {"message": "Hello World!"}
Start the Uvicorn server by running:
uvicorn main:app --reload
The — reload flag ensures that our server reloads on any changes.
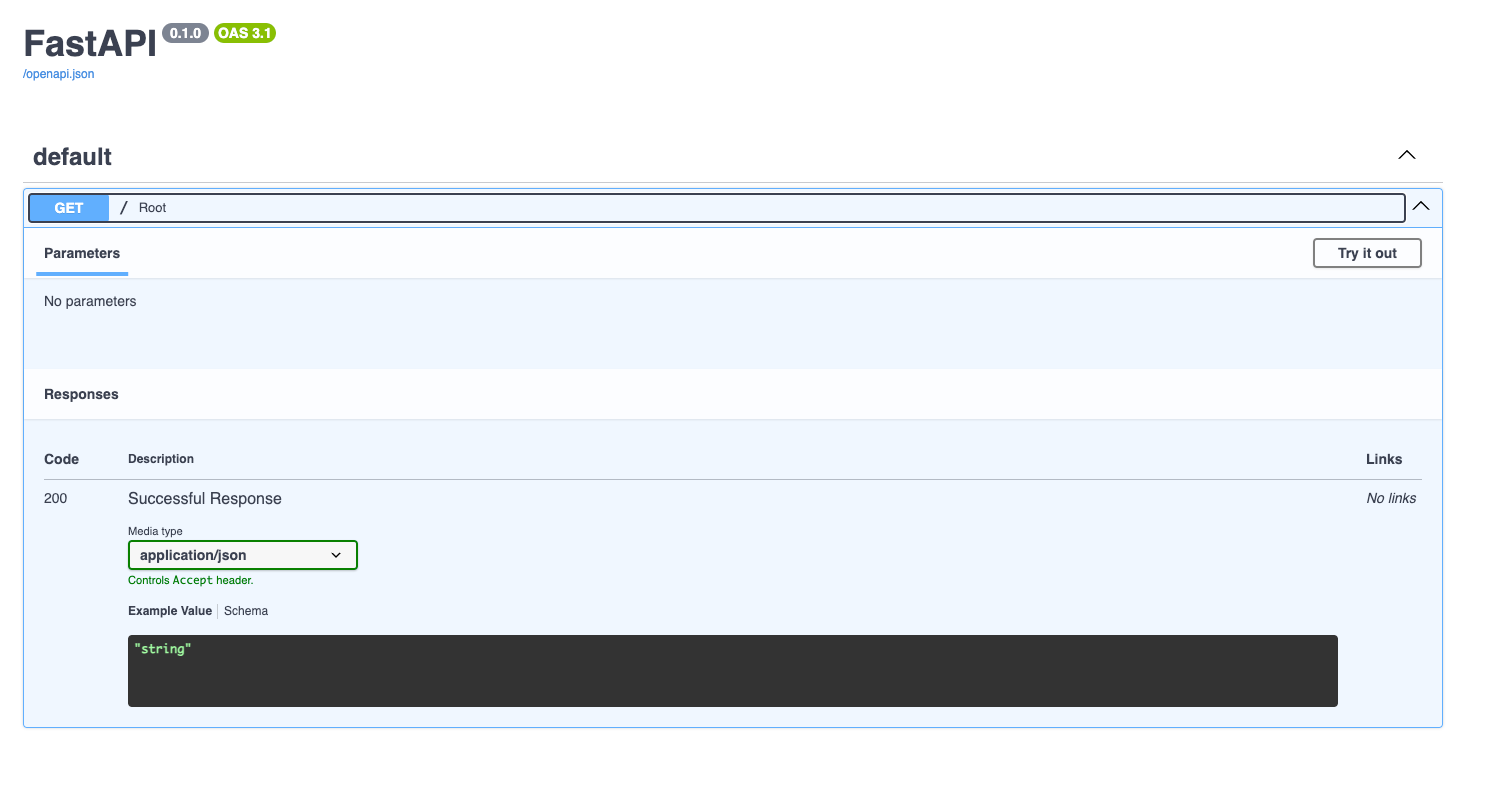
Once the server is up navigate to the address http://127.0.0.1:8000 to see the following JSON response.
{"message": "Hello World!"}
Visit http://127.0.0.1:8000/docs for the Swagger-powered API documentation. We will also use it to interact with our API.
Create Serializers
The Avatar properties will be a set of pre-selected choices that will be easier to work with. Let’s go ahead and create the file to hold the Enums we’re going to need. In ./avatars_as_a_service/serializers/ create a file called AvatarFeatures.py
mkdir ./avatars_as_a_service/serializers/ && touch ./avatars_as_a_service/serializers/AvatarFeatures.py
Add the following code to it:
from enum import Enum

# Will be used to specify whether to create a cartoon-y avatar or something less fun :/
class Mood(Enum):
    FUN = "fun"
    OFFICIAL = "official"

class HeadShape(Enum):
    OVAL = 'oval'
    ROUND = 'round'
    SQUARE = 'square'
    HEART = 'heart'
    TRIANGULAR = 'triangular'

class SkinTone(Enum):
    FAIR = 'fair'
    MEDIUM = 'medium'
    DARK = 'dark'

class SmileType(Enum):
    WIDE = 'wide'
    FULL = 'full'
    CLOSED_LIP = 'closed-lip'
    OPEN_LIP = 'open-lip'
    TEETH_BARING = 'teeth-baring'
    SMIRK = 'smirk'

class NoseType(Enum):
    STRAIGHT = 'straight'
    ROMAN = 'roman'
    BUTTON = 'button'
    SNUB = 'snub'
    WIDE = 'wide'
    NARROW = 'narrow'

class EyeColor(Enum):
    BROWN = 'brown'
    BLUE = 'blue'
    AMBER = 'amber'
    HAZEL = 'hazel'
    GREEN = 'green'
    GREY = 'grey'
Next, Create the Avatar Serializer. This file will hold the Avatar properties, Request, Response and other classes.
touch ./avatars_as_a_service/serializers/Avatar.py
Add the following code to it:
import os

from pydantic import BaseModel
from typing import Union
from openai import OpenAI
from dotenv import load_dotenv

from app.serializers.AvatarFeatures import Mood, HeadShape, EyeColor, SkinTone, SmileType, NoseType

load_dotenv()

class Avatar(BaseModel):
    skin_tone: Union[SkinTone, None]
    head_shape: Union[HeadShape, None] = None
    eye_color: Union[EyeColor, None] = None
    smile_type: Union[SmileType, None] = None
    nose_type: Union[NoseType, None] = None
    glasses: Union[bool, None] = False
    mood: Union[Mood, None] = Mood.FUN
    description: Union[str, None] = None

    # Method used to generate a prompt string from the various properties supplied
    def generate_prompt(self) -> str:
        if self.description and self.description != '':  # If a description is provided then it will override the other Avatar properties
            return self.description

        prompt = 'create an avatar for a person with the following description: '

        if self.skin_tone:
            prompt += f'{self.skin_tone.value} skin color/complexion, '

        if self.head_shape:
            prompt += f'a {self.head_shape.value} head, '

        if self.eye_color:
            prompt += f'{self.eye_color.value} eyes, '

        if self.smile_type:
            prompt += f'a {self.smile_type.value} smile, '

        if self.nose_type:
            prompt += f'a {self.nose_type.value} nose, '

        if self.glasses:
            prompt += f'and with a pair of glasses, '

        if self.mood:
            if self.mood.value == 'fun':
                prompt += f'and make it fun and/or cartoon-y.'
            else:
                prompt += f'and make it official and/or office appropriate.'

        return prompt

    def dall_e_2_search(self):
        try:
            client = OpenAI(api_key=os.getenv('OPENAI_API_KEY'), )
            response = client.images.generate(
                model="dall-e-2",
                prompt=self.generate_prompt(),
                size="256x256",
                quality="standard",
                n=1,
            )

            res = AvatarResult()
            res.image_url = response.data[0].url
            return res

        except Exception as e:
            print(str(e))

class AvatarResult(BaseModel):
    image_url: str = None

class AvatarRequest(BaseModel):
    properties: Avatar

class AvatarResponse(BaseModel):
    data: AvatarResult = None
    prompt: str = None
We will be using Dall-E 2 to generate our avatars. Don’t forget to grab an OpenAI API key and paste it into your .env file at the root (/) of your project by running the below command:
echo "OPENAI_API_KEY=<paste-api-key-here>" > .env
Install OpenAI’s Python library by running:
poetry add openai
Create web routes
We’re now ready to create our first web route. Open the main.py file and paste the following code:
from fastapi import FastAPI
from avatars_as_a_service.serializers.Avatar import AvatarRequest, AvatarResponse

app = FastAPI()

@app.post("/query")
def search(req: AvatarRequest) -> AvatarResponse:
    avatar = req.properties

    res = AvatarResponse()
    res.data = avatar.dall_e_2_search()  # Get OpenAi Payload Image URL
    res.prompt = avatar.generate_prompt()

    return res
The route above takes an AvatarRequest object and returns an AvatarResponse object. The AvatarRequest object takes in the following parameters:
// AvatarRequest
{
  "properties": {
    "skin_tone": "",
    "head_shape": "",
    "eye_color": "",
    "smile_type": "",
    "nose_type": "",
    "glasses": bool,
    "mood": "",
    "description": "" // Optional
  }
}
The AvatarResponse object returns the following:
// AvatarResponse
{
  "data": {
    "image_url": "string" // Our avatar
  },
  "prompt": "string" // The prompt that was sent to OpenAI
}
App testing
Once that’s done our app is ready for testing. Head to our API docs and click “Try it out” to customize the query object.
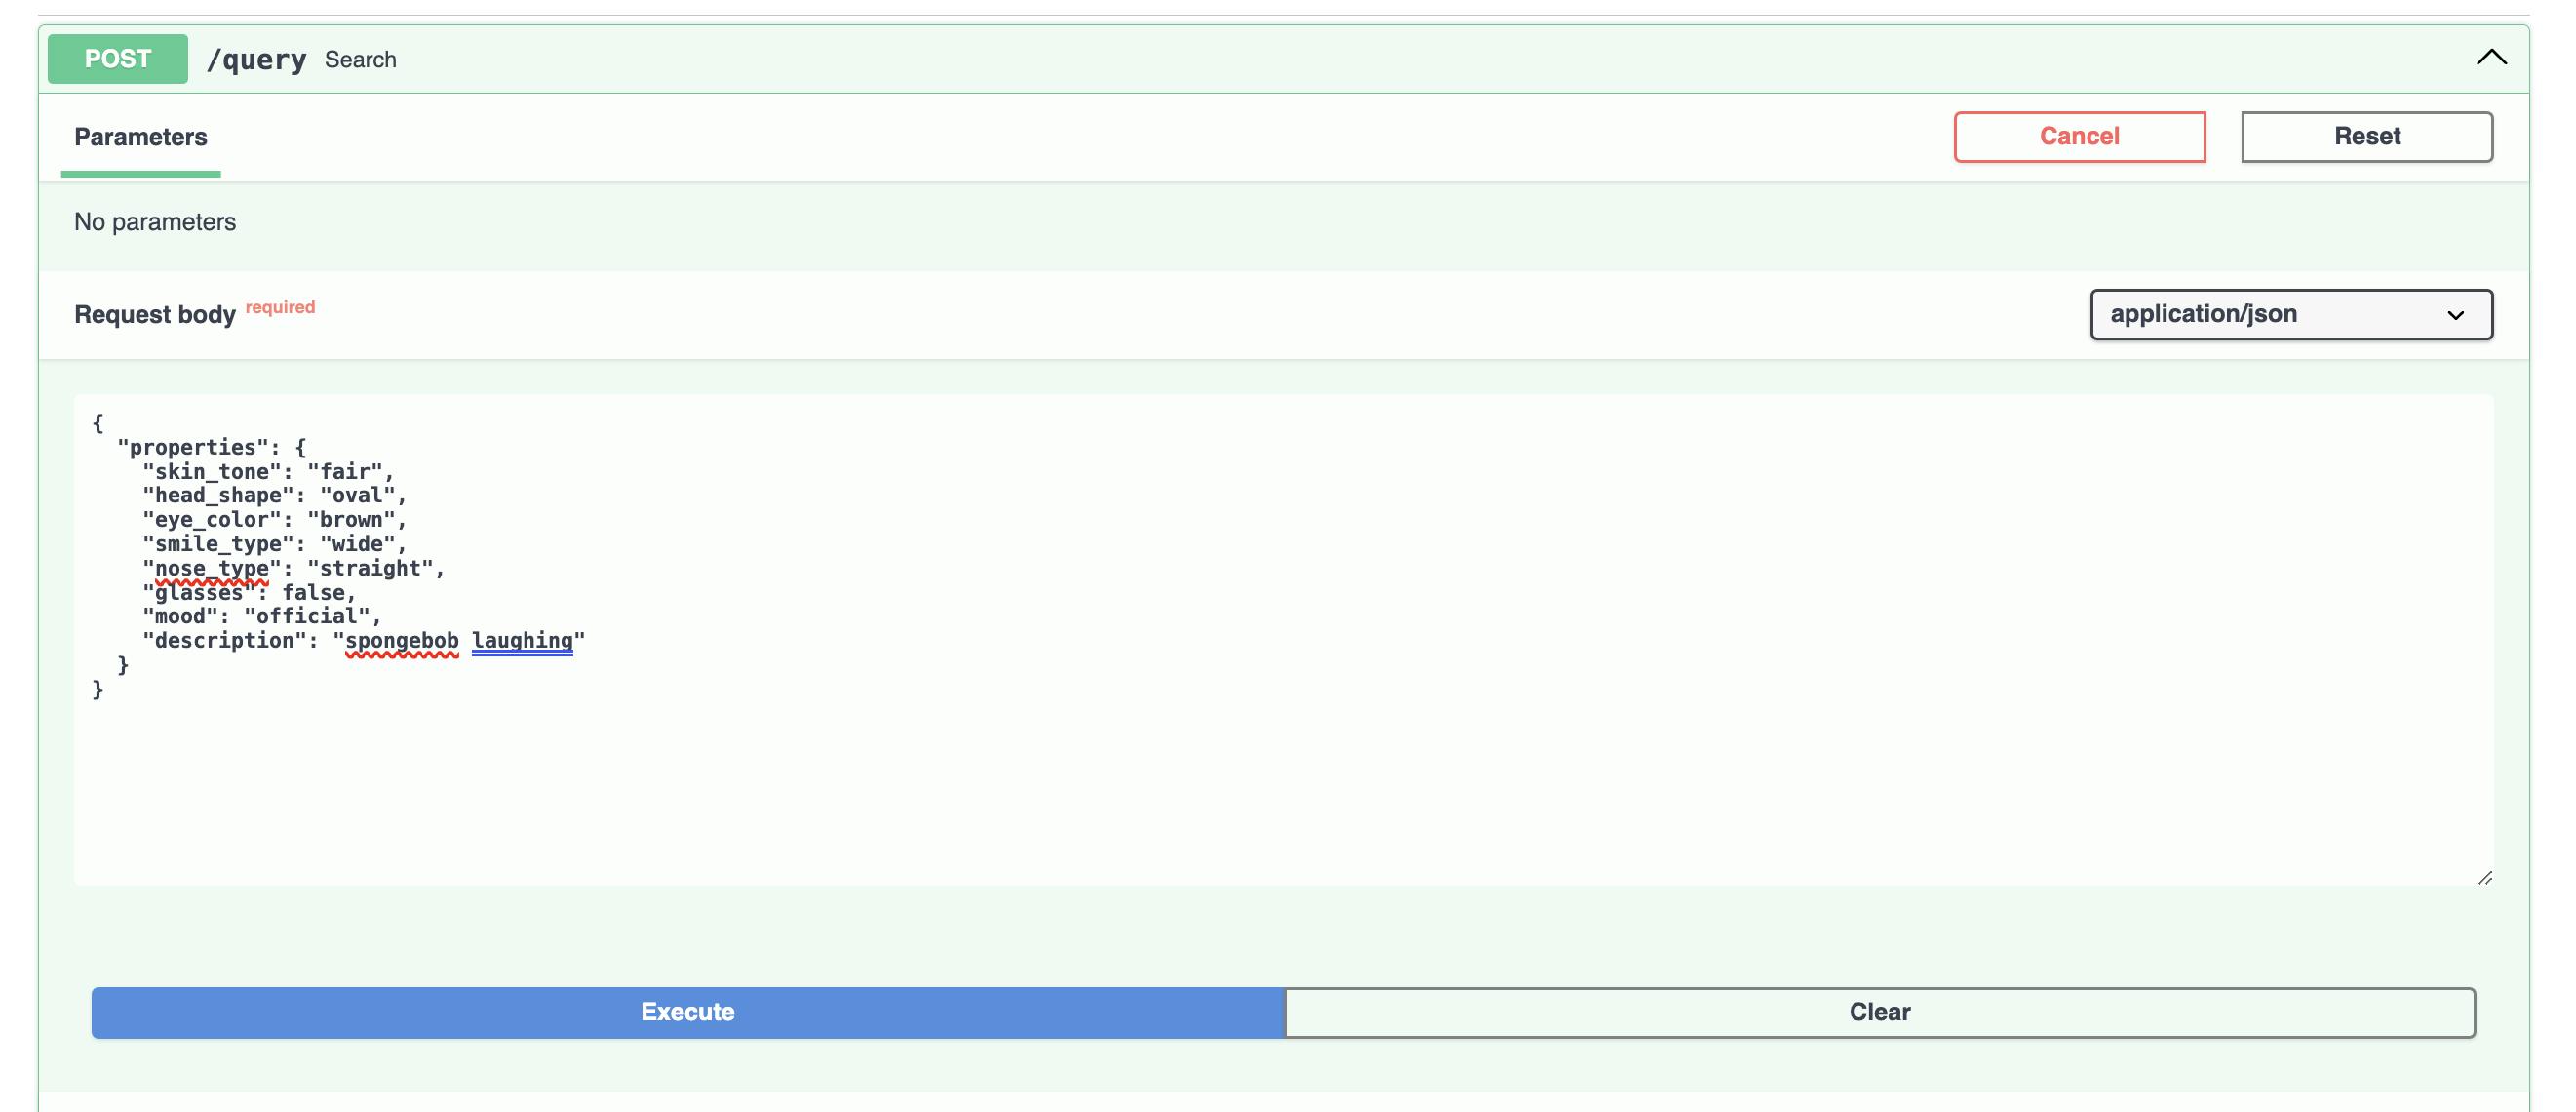
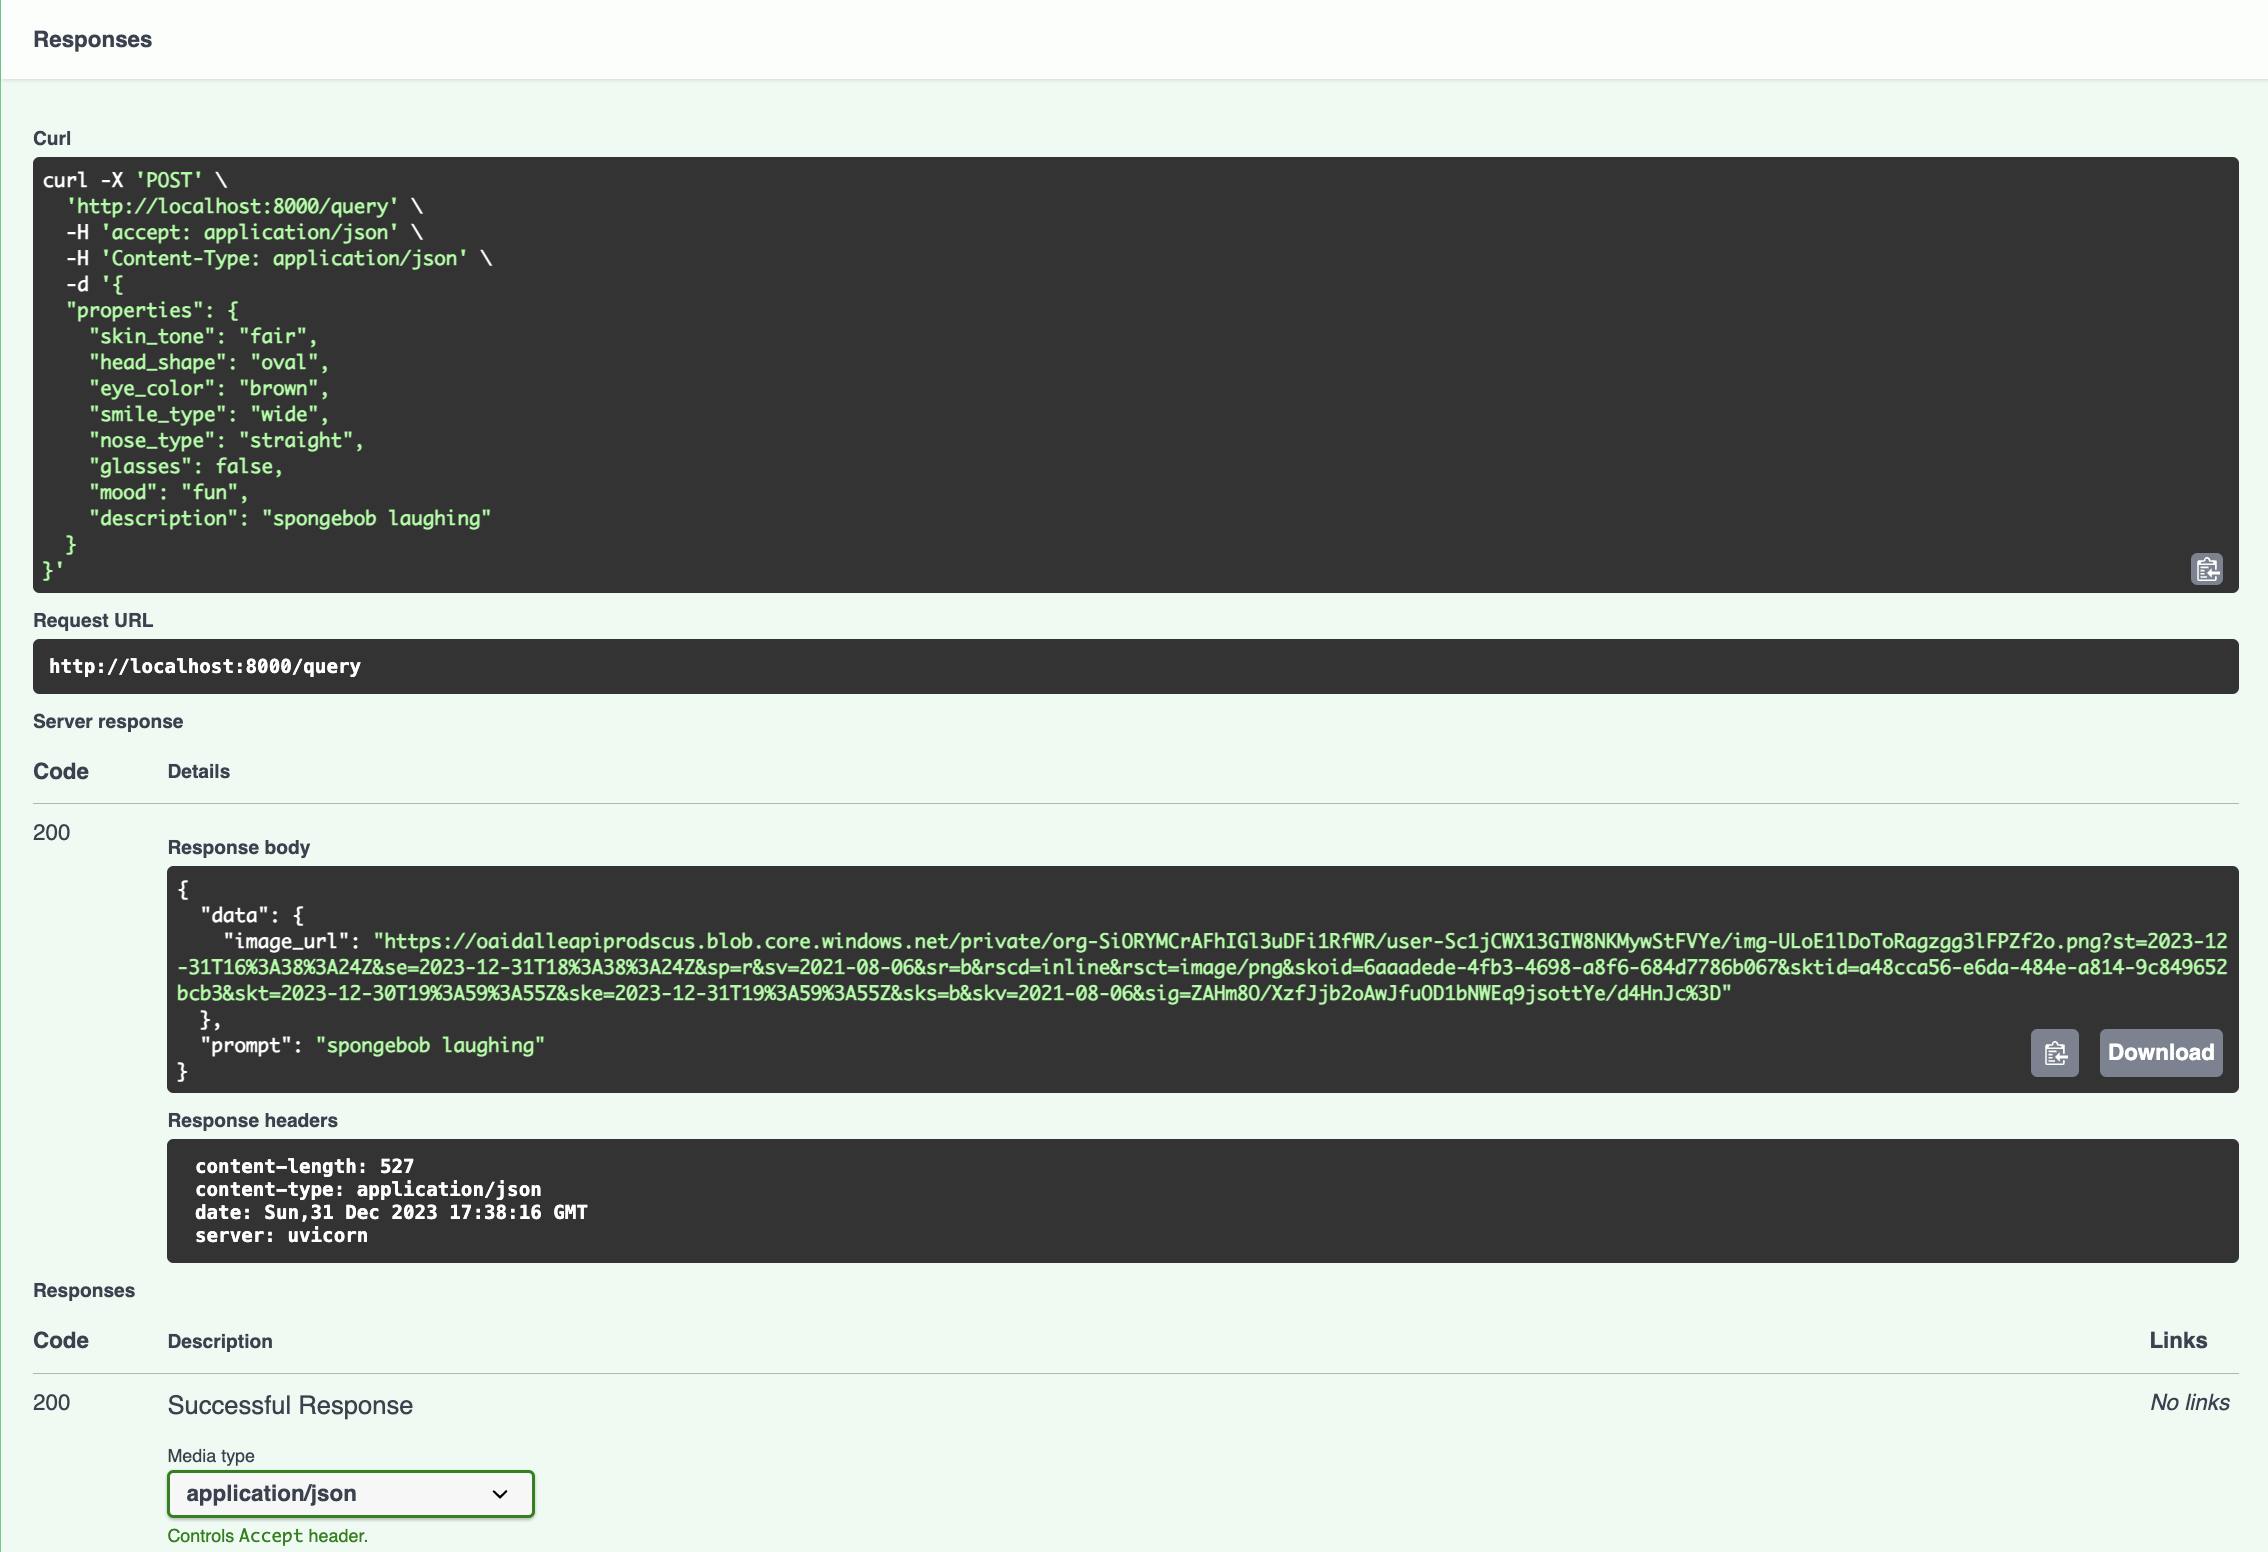
The description we’ve entered overrides all the selected(default) avatar properties. This is the image generated for the prompt(description) “spongebob laughing”
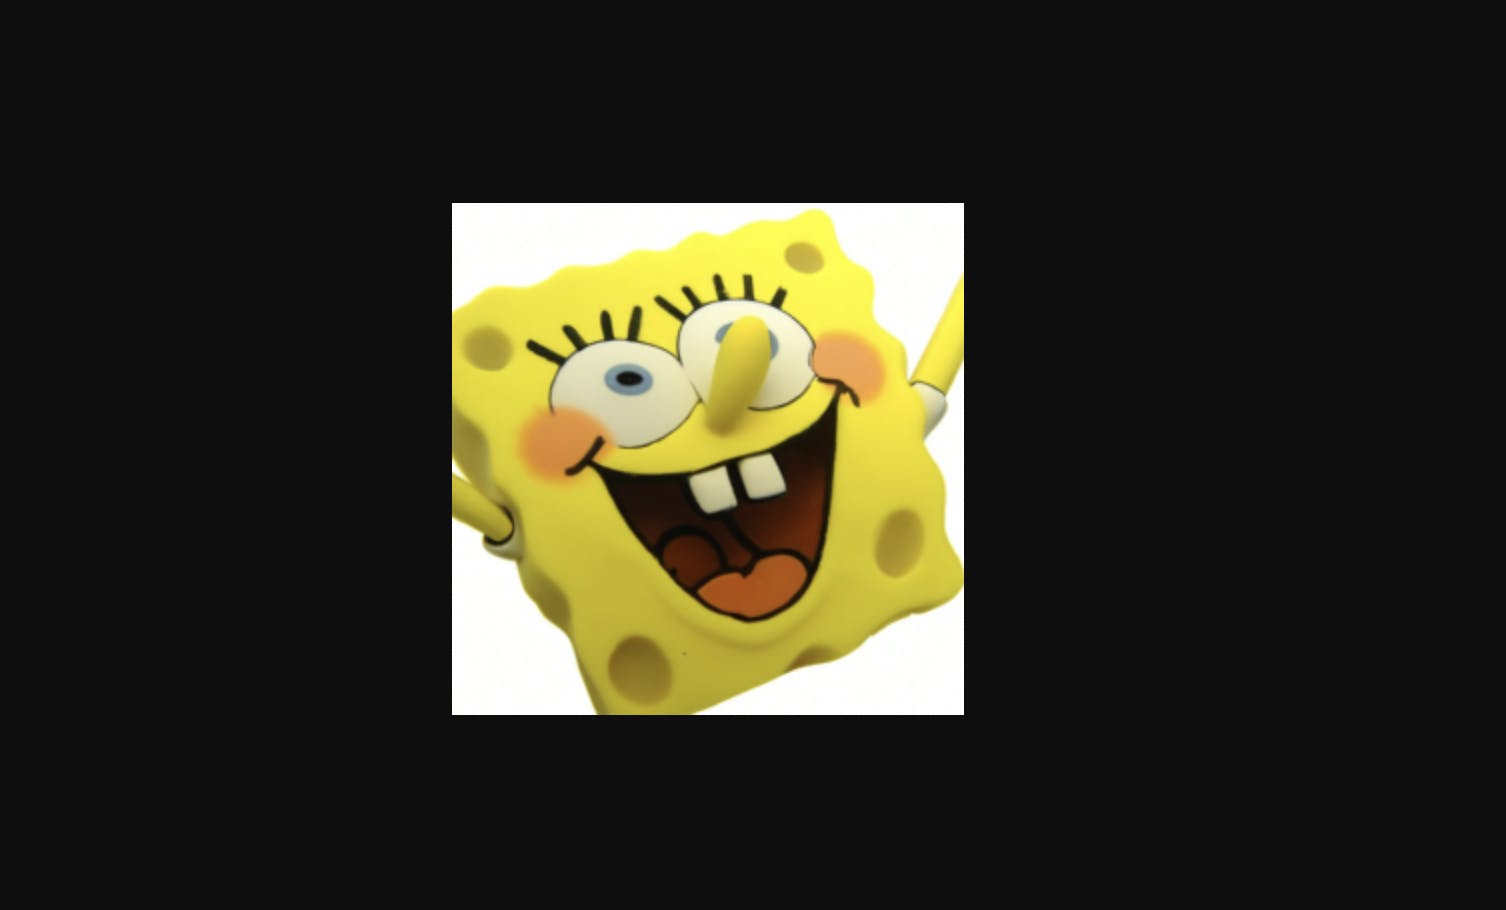
But that’s not quite the type of avatar we want. Let’s build one with the correct properties.

The above query does run correctly, and it returns an AI-generated avatar. Yay! 🎉

Conclusion
We’ve finally reached the end of Part 1. Our app creates fun avatars based on several features provided. In Part 2, we will package the app to run on docker containers for easy deployment and distribution.
Cheers!